Table of content
This article describes manual steps to move your Rich Forms configurations to another site in your SharePoint environment or even another Tenant.
The site where you want to import the configuration can be created from a site template or just a clean subsite.
Therefore it is possible to store the site as a template, restore the template and import the Rich Forms configuration!
You at least need to have skybow Rich Forms version 3.1.7.4 or upper installed to have this functionality available!
Preparation steps
- Of course skybow Rich Forms needs to be installed and running on your source site.
- Recommended browser to execute the scripts is chrome. Because in chrome browser we are able to show the progress of the scripts.
- Download the ImportExportScripts.zip file attached to this Article
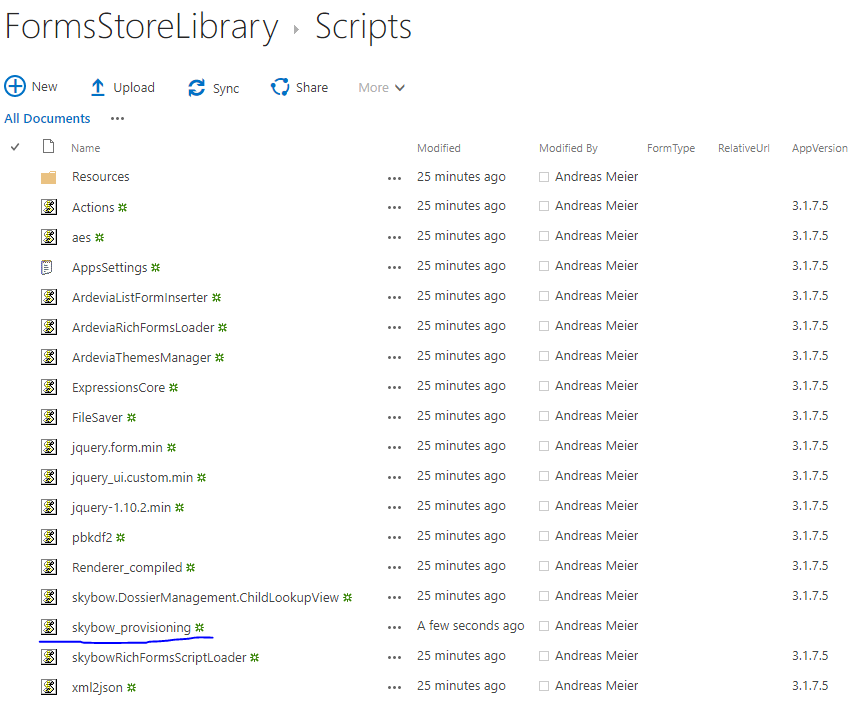
- On your source site navigate to [YOUR_SITE]/FormsStoreLibrary/Scripts/ and check whether skybow_provisioning.js file exists or not, upload the file if it does not exist, if it exists replace it with the new file from the downloaded zip file.
- If there is an ExportedForms folder in [YOUR_SITE]/FormsStoreLibrary/, delete it.
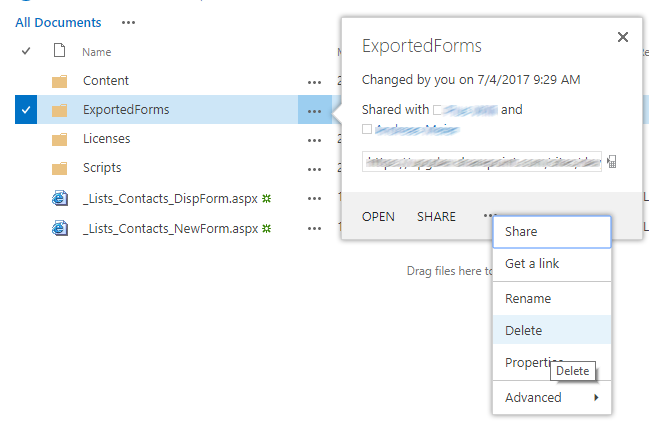
- If the folder ExportedForms is not deleted you will get an error during exporting

Export steps on source site
- You only need to do this steps once per site, all the configurations of all your lists will be exported with one run.
- Clear your browser cache.
- Navigate to a form in edit mode, it does not matter what form just a form where a form was configured with skybow Rich Forms.
- Open web browser console by pressing F12.
- Copy & Paste the script from the file ExportForms_v1.js into the console and hit enter.
- This script will create a folder called ExportForms in [YOUR_SITE]/FormsStoreLibrary/ and executes skybow Rich Forms export for each form located in the current Site. The exported forms are then stored inside this folder.
- When you are in chrome you will see the progress of exporting forms execution. Just wait until this is finished, the browser and the current site should not be closed because it will end the execution of exporting.
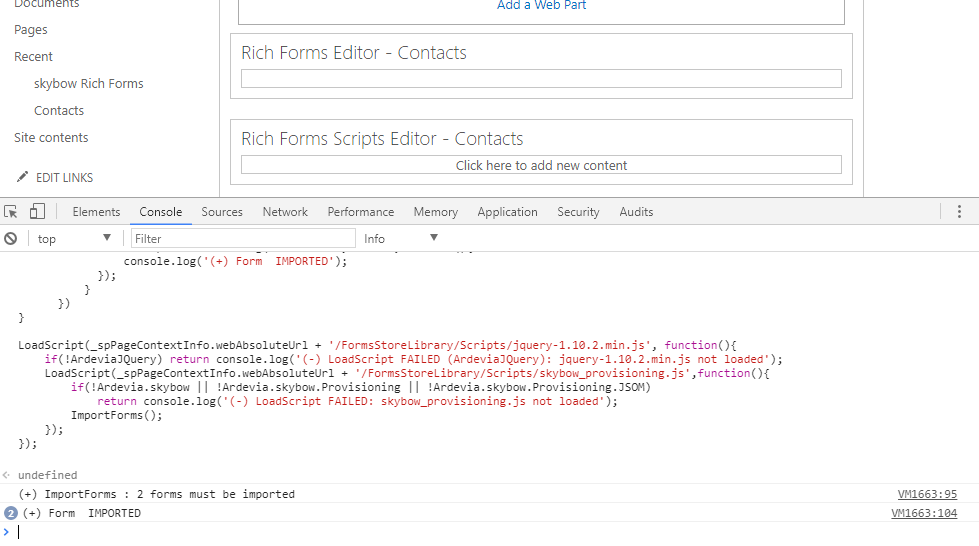
- In our example we only have 2 items to be exported, you can see if the script has finished as soon you count the same numbers of exports like the summary at the beginning

Recommended step save site as template and create site from template
This is the recommended way to do.
- After the export of the forms is finished you need to save this site as a template (SharePoint out of the box functionality).
- Uninstall skybow RichForms from this site.
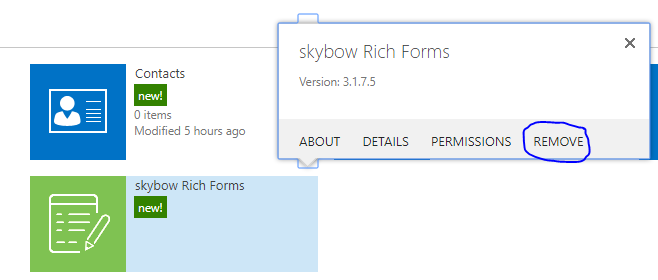
- Because else SharePoint is not able to save this as a template you will get following message when you try to save the template:
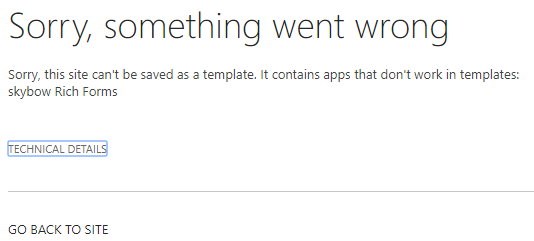
- Navigate to [YOUR_SITE]/_layouts/15/savetmpl.aspx
- Enter all the information (give a meaningful filename and template name :-) ) and check the "Include Content" checkbox.
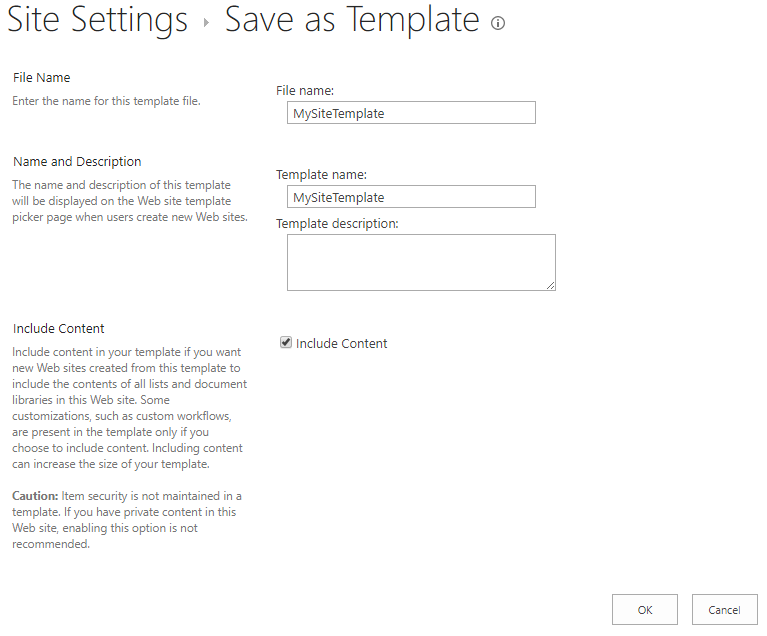
- After this process is finished your template is stored into the solution gallery.
- And during creating a new subsite you are able to select your own template:
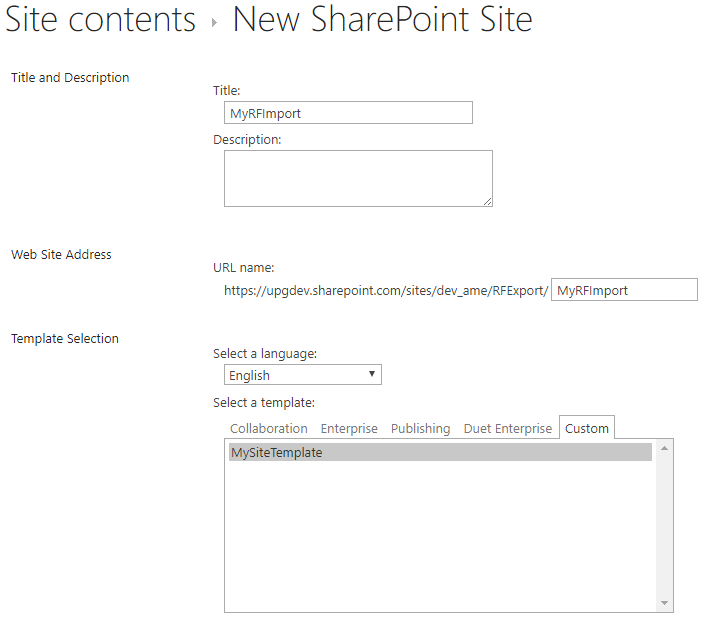
- Create the new subsite out of this template
- Uninstall skybow RichForms from this site.
If you have SharePoint publishing feature enabled on the site you want to save as template you need to set the SaveSiteAsTemplateEnabled property to true via PowerShell or SharePoint Designer.
Steps if you start from a clean site
This step is not recommended because there can be easy failures of wrong naming of lists and fields and all the other needed assets.
If you do not want to store the site as template (previous step) and restore it, then you need to do following steps:
- If you do not create the subsite out of the original template, there are some things missing.
- You need to install skybow RichForms on the new subsite
- Recreate all the lists with the exactly same naming and fields!
- The skybow RichForms customization you do not need to do, just ensure that the lists and fields have the exactly same name!
- Copy and paste the folder ExportForms in [YOUR_SITE]/FormsStoreLibrary/ to the new subsite
Import Steps on target site
- skybow Rich Forms needs to be installed on the target site first.
- Ensure that the skybow_provisioning.js is inside the folder [YOUR_SITE]/FormsStoreLibrary/Scripts/.
- Navigate to the list where you did the skybow Rich Forms customization on your source site in your target site.
- Open your browser console by pressing F12 and copy & paste the script from the file ImportForms_v1.js
- Refresh your page -> ctrl + f5
- Copy & Paste the script from the FixJsLinks_v2.js file into the console and hit enter
- This Script does correctly set the jslink url's to the webparts needed for skybow Rich Forms in your new site.
- After completing you will see that it pocessed as many forms as shown in the first line of the output:
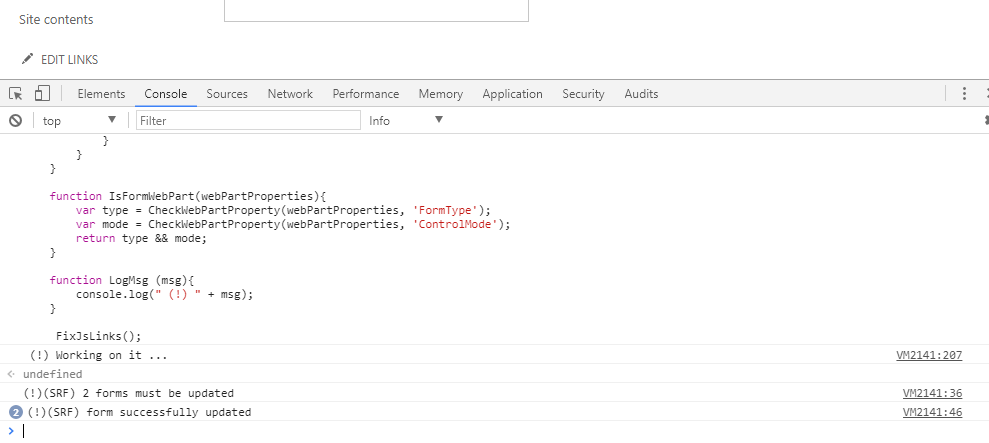
- Finally navigate to your form and see if everything restored correctly. Do not forget to clear cache if something looks strange.
- your done :-)
Troubleshooting
In general after importing the configuration try to clean your browser cache first.
Custom scripts must be enabled on your SharePoint tenant.
The same versions of skybow Rich Forms must be installed on source and target site.
Export / Import
- Ensure that the skybow_provisioning.js file is inside the folder [YOUR_SITE]/FormsStoreLibrary/Scripts/.
- Ensure that the jquery-1.10.2.min.js file is inside the folder [YOUR_SITE]/FormsStoreLibrary/Scripts/.


